08.26
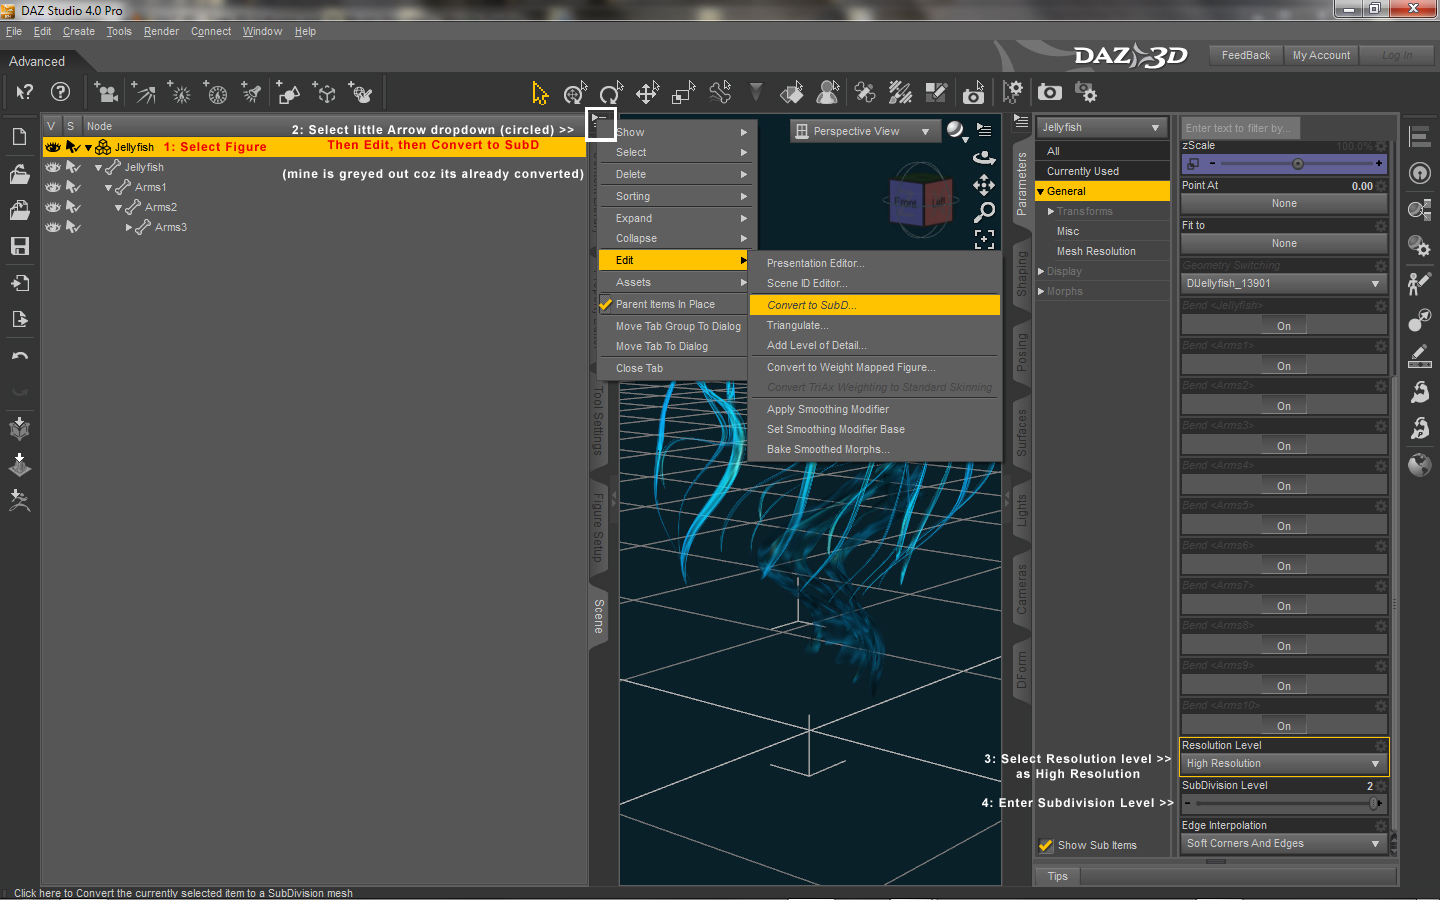
Ok so I did a mini tutorial, showing how to convert to subd in DS4P, coz its a bit different than it was in DS3A and kind of obscured in the UI. This was mostly coz if I write something down and see it in image form, I remember LOL But figured it might help other people, too.
Just click the image to englarge – everything Ive used is highlighted in Yellow.

* Select little arrow dropdown (circled in the image) then select edit, then select convert to SubD (mine is greyed out, as the figure has already been converted)
* Select the General Tab and scroll all the way to below the dials (make sure the figure is selected in the scene tab, or it will not show the subd options
* Select Resolution level as high resolution
* Enter Subdivision level (mine is shown at 2)
Note: My UI might be different than yours, as I have added the “Scene” (among other things) to my left (and right tabs) I am also using City Limits for my workspace.
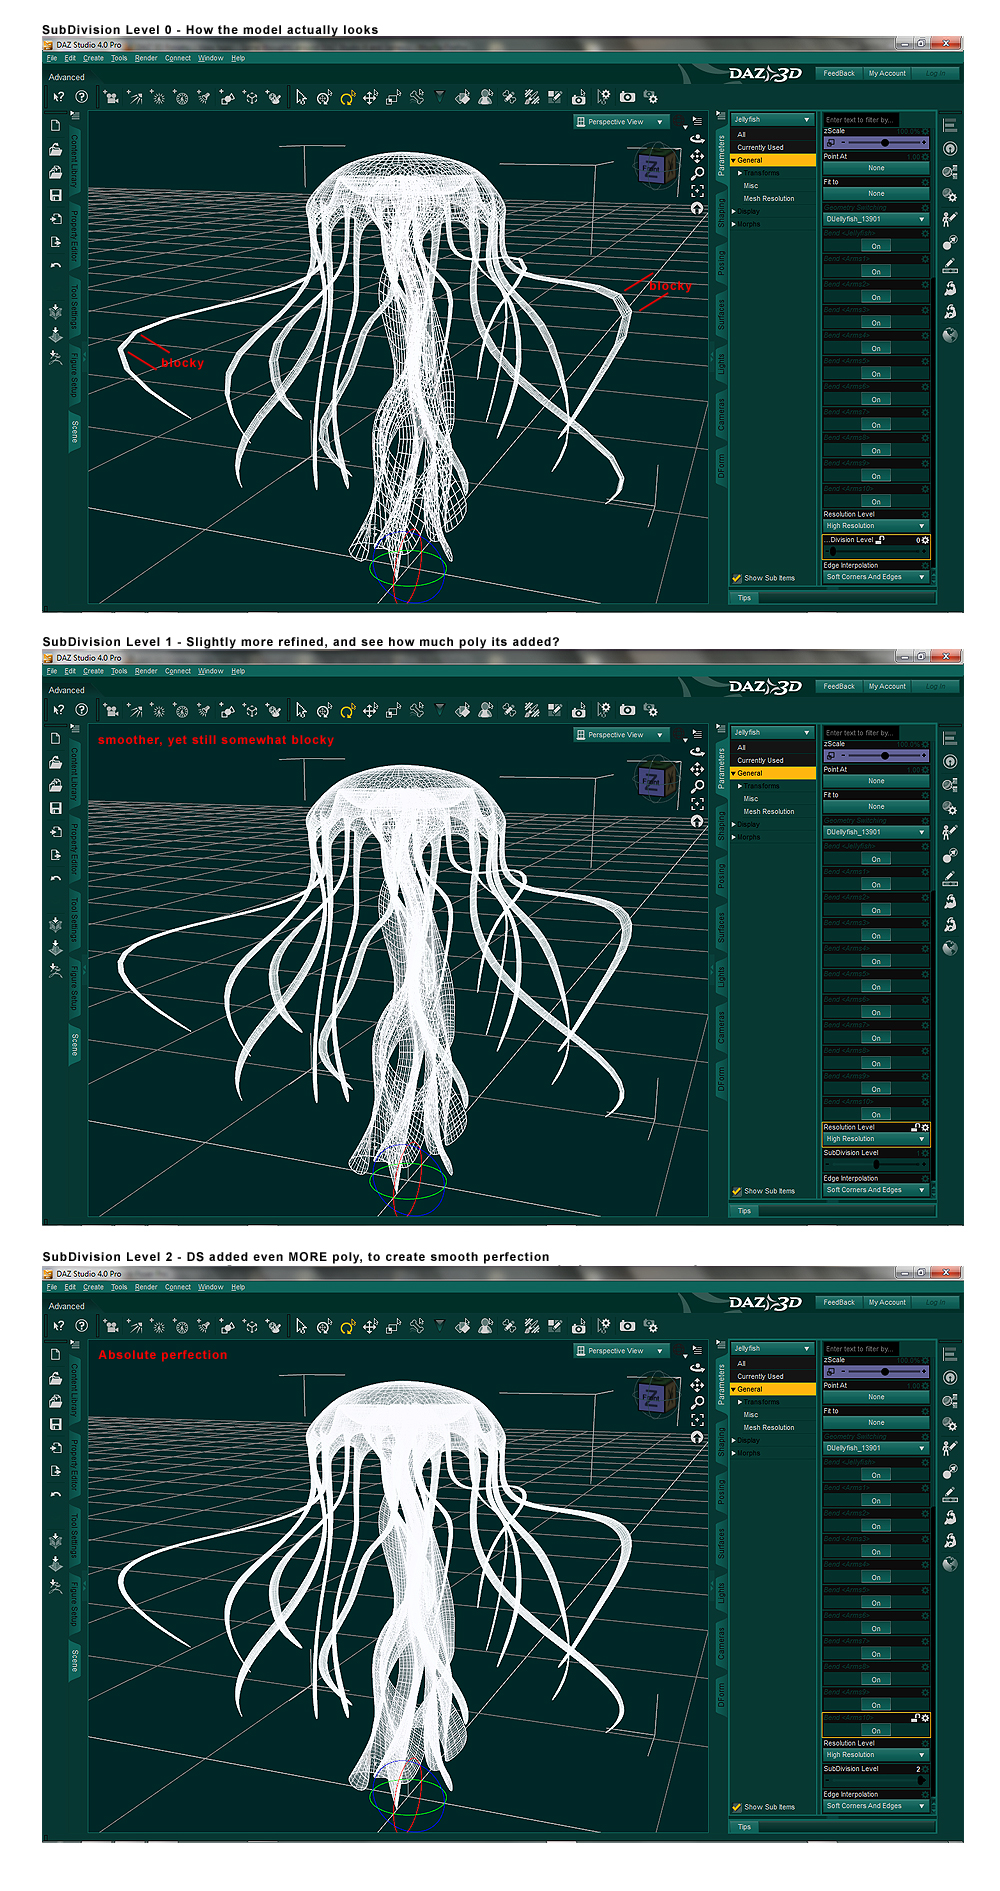
So, what does adding SubD in DS do? It adds polygons to a mesh, to make it more refined than the object actually is. This allows you to model a lower poly mesh, and then refine it in DS to look smoother (which is more efficient than modelling it high poly to begin with)
Take a look at this illustrated example to see what I mean:

And yes, for the record, my UI did change colors lol The first screenie was done before I changed it to teal