2012
09.11

Cavity Maps in ZBrush

So did a tutorial which demonstrates how to make cavity maps in ZBrush, which you can then use to bake into your textures for added depth and realism.

Requirements are obviously ZBrush and Photoshop (or some image editing program that can handle layers as well as layer modes)


2012
08.17

Updates to Damage Inc

There have been lots of updates I’ve been making to my site. So here is the list of what’s updated or new:

Main Site: The Evil Control Panel on the main navigation has been updated to omit obsolete links, and add new ones in.

Underworld: The forum has new ranks! Now you can earn fire for posting. The more you post, the higher your rank goes. Come by and join in the mayhem! Show us your renders, gab and more!

Creepshow: I have completely redone the design. Now, it has a film like feel to it, to really incorporate the play on “peepshow” A new navigation dropdown has been added to the bottom of the gallery as well, for quicker and easier navigation.

And thats all for now! Come check out the new updates!

2012
08.07

Dark Apocalypse: Shrieker

Release Date: August 2012
Store Product Page: Shrieker
_______________________________________________________

________________________________________________________


“And with a shriek…. it devoured its prey”

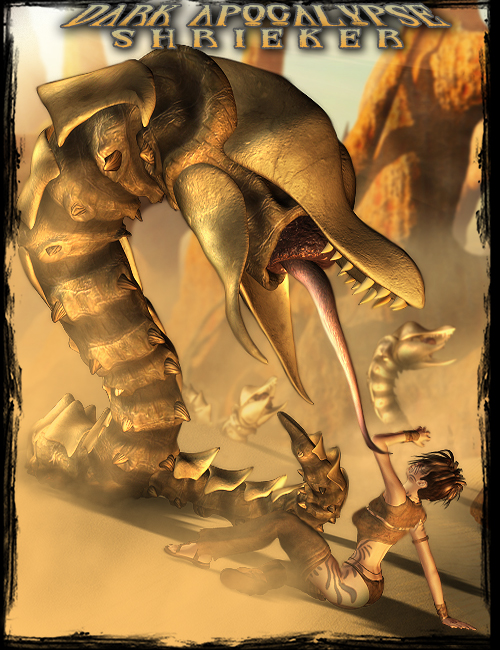
The Shrieker – a terrifying subterranean creature that is but one of the horrors of this wasteland world.

Called thus, for the blood-chilling shriek it lets out when it’s about to feed, this creature is super stealthy and super fast, as it slithers in the sand using claws that enable it to dig. But its speed pales in comparison to its brutality. It will devour anything that it senses. As it’s a creature that lives underground, it has no eyes… but don’t let that fool you – it can sense vibration miles away. It is also really hard to kill, due to the bony plating on its back that protects it (not to mention, its gargantuan size)

Shriekers also have a form of camouflage, so they can change color to match their environment – The sand color it dons, is to camouflage itself in the sands of the desert. They can also turn red and black on a whim.

Fortunately, it is only found in one semi-shaded area of the desert, as its too hot elsewhere.
This place is known as the lair of the Shrieker. And you don’t want to get caught there…

===== LIST OF CONTENTS: =====

Shrieker Figure
IK setup on Tail and Neck (off by default)
Blank Channels for custom morph inj pose support
Jaw Open Morph
Jaw Close Morph
Mouth Close Morph (tongue recedes and hole closes)
Teeth Longer Morph
Teeth Gone Morph
Tongue In Morph
Tongue Out  Morph
Mouth In/Out Morph
5 Tongue Movement Morphs
Fat Boy Morph
Belly Fed Morph
Indent Claws Morph

MATS for Figures
Sand
Black
Red

20 Poses
1 Reset Pose
10 Writing and Upright Poses
5 Slithering Poses
5 Dead or Sleeping Poses

===== INSTRUCTIONS: =====

..:: USING THE CONTENTS ::..
You can find the figure in Character/Dark Apocalypse/Shrieker. Click to load the CR2 into your scene…. it will load massive, so you will have to pan the camera back to get him fully in the scene.

Easy Pose: The figure has Easy Pose set up on it… this will aid you in posing him quickly via a node which controls entire chains in segmented figures such as this is. The node will control the neck and tail chain separately. You can then select the individual segments, and further use the EP dials on them to twist it up even more. Additionally, the normal rotations are enabled, for further posing. Limits are set but not forced (to turn on limits in Poser, go to Figure/Use Limits) In DS, they are generally on when u open DS. To turn them off or on, select the pose tab, select the active tab options, then go to limits on the drop down to select off or on.

Beyond that, the figure also has IK setup on it… but this is turned off by default. To turn it on in Poser, go to Figure/Use Inverse Kinematics, and select the tail, neck or both. In DS, it should be automatically enabled (to disable, right click on each segment, and click Enable IK if there is a checkmark)

A bunch of morphs have also been created for the figure. There are 5 tongue morphs (to give it movement) as well as a tongue length, mouth close (recedes the tongue, and closes the mouth hole) jaws open (opens the jaws even wider) and close (closes the jaw around the mouth, recedes the tongue, etc) There’s a teeth gone and teeth longer morph, a fat boy morph (turns the wyrm into a fat one, rather than its svelte default form) and Belly fed (to create the illusion is has eaten… a lot) Finally, there is Indent Claws… this creates an indentation on the all the belly claws, as it would most naturally occur. As always, when dialing in morphs, it is best to dial them only once using the BODY actor in Poser (or the Shrieker actor in DS)

Last but not least… there are blank channels inserted into the figure. This is so you can easily create custom morphs via pose injections, without the use for external binary morphs and PMD’s. There are 140 in all.

There are 3 mats also included – Black, Red and Sand. These have Subsurface scattering on them, so you must have that enabled in Poser, in your render settings, to render the SSS. In DS, they are also enabled, but this requires EHSS (elite human surface shader) to render them properly.

Also included are 20 poses to get you started. 5 of them are Dead Poses, 5 are slithering types, 10 are writhing or upright and there is one reset pose. Just click on the pose to load it to the figure. Also note, LIMITS MUST BE OFF for these poses to work correctly (as I pose beyond limits)

===== OTHER NOTES: =====
Color coded and labeled templates for all figures and props are available, so you can make your own textures.

Shrieker Figure has blank injection channels for custom morph support

IK is enabled on the tail and neck chains of the figures. It is turned off by default

This figure contains Subsurface Scattering. You must enable SSS on your render settings in Poser. In DS, the mats require EHSS to render the subsurface scattering on the DS mats.

==== XTRA SUPPORT: ====

BIGGER THUMBS:

The thumbnails for the pose and light files are the standard 91X91 resolution, so that they will show properly in DAZ Studio. If you are a poser 5 or higher user and prefer the larger thumbnails (which are 125×125 in size), you can download them here: Shrieker Thumbs

Please Note:
Bigger thumbnails will NOT work in DAZ Studio, nor lower versions of Poser, so only download these if your using Poser 5 and higher.

Instructions to install larger thumbnails:
These are set up to the same exact locations as the original sets thumbnails. To install, simply unzip it to your Poser Runtime, and overwrite the old thumbnails.

POSES – NO TRANSLATE:

Also, I have created poses that will allow you to move the shrieker in a scene, and apply a new pose without the translate zeroing out (per request by a user) That way, if you have already started a scene, you can apply a pose without it moving off camera.

You can download the poses here: Poses – No Translate

These poses will install to the same directory and overwrite the old ones (so if you want to keep both, I recommend installing these manually to a new folder in the Shrieker Pose folder, and copying the thumbs from the original to that folder)

==== KNOWN ISSUES ====
No known issues beyond what you would normally encounter. Please refer to the PDF for help and tips.

Technical Support is always available. If you have questions that need answers, feel free to email me — IgnisSerpentus@damageinc3d.net

2012
07.06

Going to be away

This notice is to let you know that I will be away from July 7th to July 10th, as I am going out of town for the weekend.

You may still email me if need be (as I will still have access) but please note that any major tech support will need to wait til I get back.

Thanks!

The Mistress of Evil

2012
06.09

Damage Inc on youtube

So, since I never officially announced it, figured I would now.

We now have a youtube channel!

You can check out tutorials as well as features of packs, and how to use certain features here:

http://www.youtube.com/damageinc3d

Be sure to bookmark it!

2012
05.29

New Gallery

So, in all my nerd like prowess, I have launched a new gallery…. HUZZAH!

Come check it out: Creepshow


* If you are a PA, I am taking registrations if you could use hosting (read the become a member page for full details)

* If you are part of my Axis of Evil/Army of Darkness, you too, can become a member. Ive set up galleries for you guys.

* To the rest: I am really sorry that I cannot open it to the general public. I have to limit the usage coz of my host.

2012
05.16

Photoshop Icon

So, after having played with my new CS6 (and totally loving the new splash screen) I made a cute little icon for my new Photoshop CS6 to match…. coz Im a dork like that 😀

Feel free to download (its in .ico format)

Download Photoshop CS6 Icon Here

2012
05.08

The Ghost in the Machine

Not only an interesting topic, but utterly fascinating for me. Could such a thing exist?

Oh, I really believe it absolutely can.

Think of the human construct as a highly advanced organic machine. The brain has electrical currents that runs thru the brain stem and central nervous system, which causes the rest of the machine to work, due to the wiring of it all. And as has already been proven, without the brain, the rest cannot exist (as well as the organs which make that machine work properly)

We each, individually, have a soul. Certain characteristics we are born with — that we don’t necessarily learn. As well as the capacity to understand emotion. And this, coupled with the brain, causes us to become animate and articulate. Each of us all a unique product of universal engineering.

So, why couldn’t a machine harness one, too? If it has the right conduits and construct, it can. And not only can it… eventually, it will. We just don’t have the correct formula to make it a reality yet (which is funny, since the correct formula exists in each of us)

But there’s a scarier question within the question — should it exist? What would be the ultimate outcome if it did?


Technologyâ„¢ making the world more complicated and scarier a little more everyday.

2012
04.24

The W.A.S.P.

Release Date: April 2012
Store Product Page:  The W.A.S.P.

_______________________________________________________

_______________________________________________________
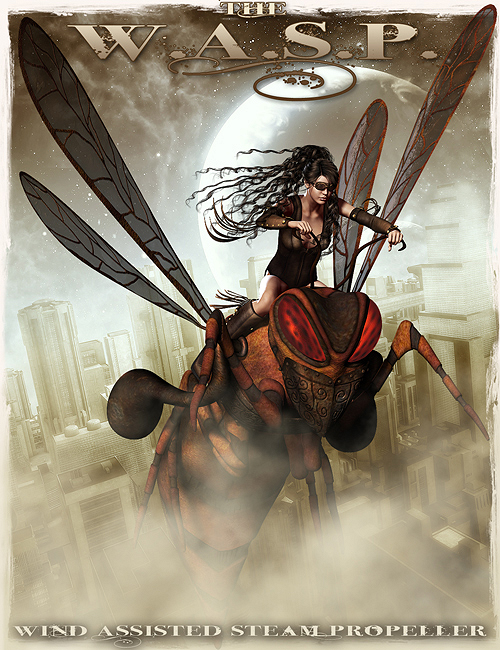

Whether you’re a fairy fleeing the fiery breath of a dragon, an alien from a strange planet out for a day of joyriding or a Victorian from the Steampunk era on a mission for tea, you are surely to ride in style, when you ride on the W.A.S.P. – a charming, mechanized craft capable of flight, which resembles three species of Wasps: The Jewel Wasp, The Yellow Jacket and the Red Paper Wasp.

Aside from merely resembling the bug itself, W.A.S.P. stands for “Wind Assisted Steam Propeller” The wings utilize the wind, to maneuver thru the sky and bank turns, while the Steam that emits from the pipes on the back provides lifting power, as well as forward propulsion. Includes MATS that turn off certain parts, so you can even create robotic wasps that are programmed to swarm and attack!

The set also includes poses for V4, M4, V5 and M5 – so no matter what figure you wish to use to ride the wasp, you can immediately get started making art, without the hassle of making your own poses. Developed for multiple genres, it will fit in many of your scenes… whether you’re a Science Fiction, Fantasy or Steampunk enthusiast!

===== LIST OF CONTENTS: =====

WASP Posable Figure
* Posable Parts include Head, Abdomen, L/R Forewing, L/R HindWing
* Blank Channels for Custom Morph INJ Support
* Limits forced to avoid over-extension

MATS for WASP
* Jewel Wasp (High-Shine Teal/Blue with a Red Abdomen and gold metal plating)
* YellowJacket (Mid-Shine Black and Yellow, with Silver plating)
* Red Wasp (Rusted out metals and plating, with polluted smog emitting as Steam)
* Utility MAT – Turn off Steam
* Utility MAT – Turn off Steampipes/SteampipeGaskets
* Utility MAT – Turn off Seat/Seat Bars

Poses for V4, M4, V5, M5 and WASP
* 10 Each that align each figure perfectly
* INJ/REM Parent for V4/M4 (only works in Poser)

===== WASP MORPH LIST: =====

* Head Morph – Intimidate
* Head Morph – Happy Face
* Head Morph – Big Eyes
* Steam Morph – 10 Movement Morphs
* Steam Morph – 10 Deforming Morphs
* Steam Morph – Longer/Shorter
* Steam Morph – Flare 1
* Steam Morph – Flare 2
* Steam Morph – Steam Off
* Leg Morphs – 5 Styles

===== INSTRUCTIONS: =====

LOADING THE FIGURE:
Browse to your Runtime:Character:TheWASP Folder, and here you will find the CR2 to load the WASP. Double click the icon and it will load zeroed in the scene. If you are using DAZ Studio, the files will be located in the Runtime Folder, in the same location as noted above.

The Wasp has 6 posable parts to the body – The head, the abdomen, and 4 wing parts. You can pose him up how you like, but I’ve included poses to get you started (which will be covered next in the tutorial)

There are also different morphs on the model, so you can change up certain features (such as the head and steam planes) It is always best to change the morphs using the BODY actor, or main node on the figure. This will change the morph for the entire body, rather than singular body parts, making an easy work out of morphing.

PARENTING and POSES: PARENTING:
Located in Runtime:Pose:The Wasp, you will find a MATS folder as well as Poses folder. Poses is the folder you want to locate the poses. In this folder, you will see DAZ Studio and Poser folders – you will naturally choose DAZ Studio, if you’re using V5 or M5. For V4 or M4, choose Poser.

This set comes with poses that align different figures to the Wasp. Because the head of the wasp (and thus, the handlebars) move, and because many of the wasp poses are flight poses, there is a certain way you must use the poses with the figure flawlessly.

First, the figure (V4, M4, or Genesis) must be parented to the Wasp’s Thorax (as this is where the seat is, and is the stationary part of the figure) This will ensure the figure you are using with the Wasp stays with it when it flies up while using the wasp poses (and will make it much easier on you to work with) You must parent while zeroed.

I’ve included a parent INJ/REM for Poser (located in with the poses, in the Poser folder), so you just need to select V4 or M4 and click it to parent the figure to the WASP. However, that pose will not work in DAZ Studio, unfortunately, as its a bit of a hack, so you will have to manually parent there

To manually parent in Poser: Load both the DAZ Figure and the WASP in the scene. While Zeroed, select V4 or M4 and go to “Figure/Set Figure Parent” in the drop down menus. Select the Wasp’s Thorax in the list. Hit ok.

To manually parent in DAZ Studio: Load both the DAZ Figure and the WASP in the scene. While Zeroed, select V4/M4/Genesis in the scene, right click and hit change parent. Select the Wasp’s Thorax in the list. Hit ok.

PARENTING and POSES: USING POSES:
After you have parented the figure to the wasp, you can then use the poses. The poses are in order numerically, so no matter what figure you are using with the wasp (and its important you use the correct numeric pose in tandem, coz the handlebars will move on certain wasp poses) the figure will align properly to the wasp pose.

So for example, if you are using V4, and WaspPose05, you would use V4Pose05 (05 also for M4, V5, M5) If you are using V5 with WaspPose03, you would use V5Pose03 (03 also for V4, M4, M5) etc. This will correctly align the figure to the wasp and the moving handlebars.

Included are 10 Poses for each DAZ figure, as well as 10 for the WASP itself.

USING MATS:
Back out of the WASP Pose Folder, and you will see there is also a MATS folder in Runtime:Pose:The WASP. This folder includes both the DS and Poser MATS. It also includes Utility MATS (under the divider “Utility MATS”)

Included are three different mats for the wasp, which are loosely based on real wasps:

The Jewel Wasp its tealish/blue with a red abdomen, and is very shiny metallic with gold metal plating. This is more of a fanciful, fantasy styled texture set… and as such, I promoed it with a fairy. It would work nicely with High Elves, Drow’s and such, as well.

The Yellow Jacket is a little bit more hardcore – with a black and yellow striped texture, and the metal slightly less shiny. In Poser, it actually has sparkles, to mimic auto paint. The metal plating is silver on this one. This one would work really well for sci fi renders (as I promoed it) with alien races and outer space…. but it would work nicely for fantasy characters, too.

The Red Wasp (based on a Red Paper Wasp) is Steampunk. Its all rusted out with heavy wear, and polluted smog emits from its steampipes instead of clean vapor. This set was originally created to be steampunk (and serendipitously, it worked with other genres) but this texture really capitalizes on Steampunk the best (though, you could feasibly use any of them as such)

There are also utility mats, which turn off certain features, such as the steam, the Steampipes/Steampipe Gaskets, as well as the seat and bars (in case you want to use the WASP without them) Turning these off would work well if you want to make a swarm of robotic Wasps that are programmed to attack. However, The wasp was not intended to be used without the metal plating… you can, but I strongly suggest leaving those on, as they kind of make the model (and it looks rather plain without them)

===== OTHER NOTES: =====
Color coded and labeled templates for all figure is available, so you can make your own textures.

Wings have Subsurface Scattering on them. You can only use SSS if you are using Poser 2012/Poser 9. Subsurface Scattering must be enabled on your render settings. Keep in mind, this will increase render time.

The thumbnails for the pose and light files are the standard 91X91 resolution, so that they will show properly in DAZ Studio. If you are a poser 5 or higher user and prefer the larger thumbnails (which are 125×125 in size), you can download them here: The WASP Thumbs

Please Note:
Bigger thumbnails will NOT work in DAZ Studio, nor lower versions of Poser, so only download these if your using Poser 5 and higher.

Instructions to install larger thumbnails:
These are set up to the same exact locations as the original sets thumbnails. To install, simply unzip it to your Poser Runtime, and overwrite the old thumbnails.

KNOWN ISSUES
In Poser 8/9 you may encounter where the wings and steamplanes render a slight grid (especially if you are rendering with Raytraced Shadows) This is actually a bug in Poser which was supposed to be fixed in SR1, but wasn’t entirely, and occurs with a combination of: one-sided meshes, raytracing and when a material has “Normals Forward” checked off on the surface settings. Since I didn’t want to exclude my P7 and lower users, and its a bug that should be fixed, all my mats have Normals Forward checked. If the grid is particularly bothersome to you like it is me, you can just uncheck Normals Forward on the Wings/Steam Planes (since in P8 and P9 it will render fine without it checked) This will get rid of the grid.

Technical Support is always available. If you have questions that need answers, feel free to email me — IgnisSerpentus@damageinc3d.net
2012
04.20

Creating Lens Flares in Photoshop

Yet another tutorial! And this one demonstrates how to create glints of light for metallics and lens flares from scratch in Photoshop, using nothing but the brushes and tools that come in PS. Also shows how to create lens reflections and anamorphic effects that would naturally occur due to lens and light distortion


Quickie tutorial demonstrates how to make custom lens flares (and apply glints of lighting to metallics) in Photoshop, using nothing but the brushes and tools that come with PS. Also shows how to create lens reflections that would naturally come off a lens flare, as well as anamorphic lens qualities to your flares, for more realism.
2012
04.15

Painting Jewels in Photoshop – Video Version

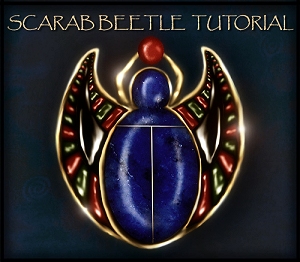
Video tutorial that shows how to paint a scarab beetle (and its gold and jewels) in Photoshop. I actually have another tutorial on this that’s in PDF format… but its as ancient as the Scarab is (from 5-6 yrs ago when I first started painting) and really needed an update. So here it is.

Below is an image of what following this tutorial produced:

The Tutorial uses Vector lines and shapes to make it easy on beginners just starting out painting.

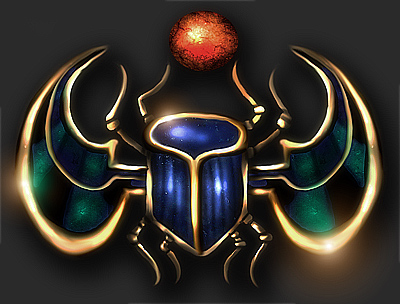
Once you get your bearings, you can change how you do a scarab entirely, and experiment with different styles (such as the one I painted below) However, this one doesn’t use Vector shapes at all to create it, so you really need to have a good handle on the tools before attempting it.

And note — a scarab beetle should only have 6 legs.

I got carried away and didn’t realize I painted 8… so its an archnibeetle LOL

You can also add shiny glints to it (which is not covered in the tutorial) While my glints were done with a flare plugin I own, you can easily achieve the same effect using a soft edged brush colored the same as your gold on a new layer, dabbing certain parts of the gold and then use layer modes on your glint layers (such as screen) or a combination of many modes on duplicated glint layers.

You can also use the dodge tool, but not only will it not be colored the same as your gold, to make the glint really shine beyond the edges of the scarab itself, you would need to flatten the image and do that last. So I recommend doing the aforementioned instead.

And remember! The smudge tool is your friend lol

2012
04.14

Using DFormers in DAZ Studio 4

Tut shows how to basically use DFormers in DAZ Studio 4

2012
04.14

Painting Hair in Photoshop – Video Version

Video tutorial demonstrating how to paint hair in Photoshop. Will most likely do a more elaborate one later on, but this will get you started