2012
04.09

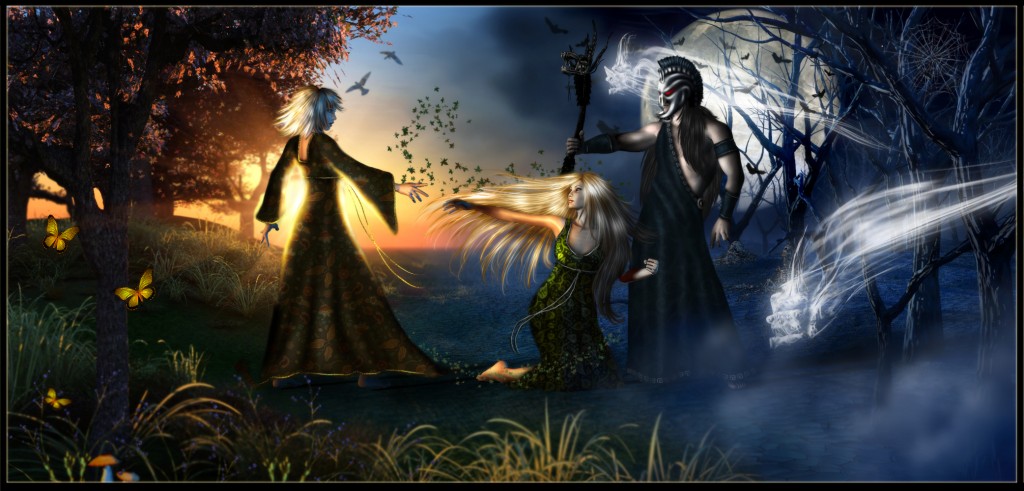
Darkness Falls

Another doodle. This one more labor intensive than my last.

The myth of Persephone (and her abduction by Hades) The two Phantom skulls represent Pain and Panic (Hades’ Henchmen)

And that concludes my rendering for now (was good practice for getting used to my new Wacom and CS5)

Its very wee to fit my tables… click for bigger

Credits:

Misc stuff by me from Prisoner of War and Azraella (all @ DAZ)

Misc DAZ critters and plants

BG’s rendered in Vue/fused in PS

Rest is painted/postworked in PS

2012
04.09

Draco Rising

Credits:

Plain M4 and Wyvern 2.0 @ DAZ

Awesome Castle by Stonemason (rendered in Vue) also @ DAZ

Rest is painted or postworked in Photoshop

2012
03.31

Bodypaint Tutorials

Ok so I did a couple video tutorials over the weekend.

The first one demonstrates how to set up a model with multiple maps in bodypaint.

The second one (duly titled part 2) shows how to use the features in Bodypaint, and how to save textures out.

2012
03.31

OMG HOW I HATE PLAMETTO BUGS! What’s that, you ask??

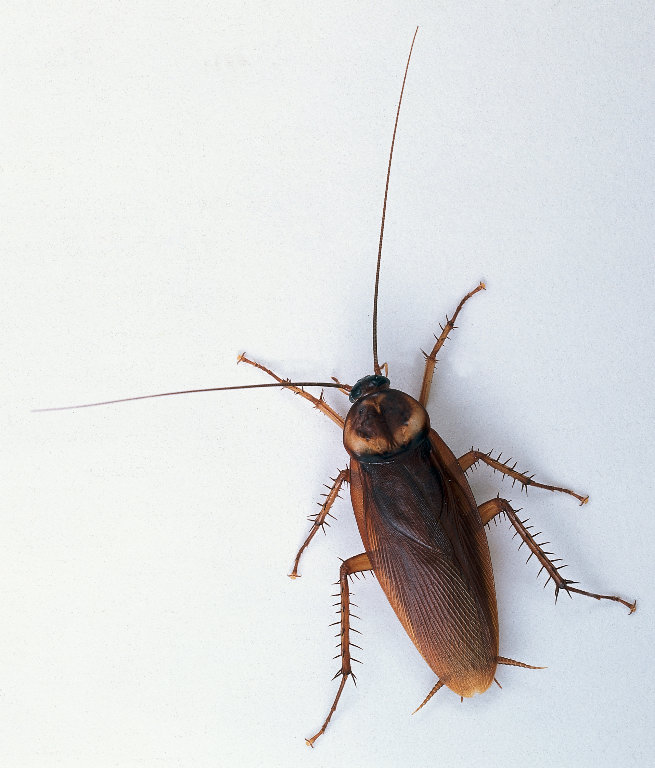
Ok, so not everyone has heard of the Palmetto bug. If you’ve ever been to, or lived in Florida, or similar climates such as Texas, chances are you have had a close encounter with one before. So before I get to my rant, let me explain what they are to the ones who haven’t: GIANT cockroaches that are actually indigenous to Africa.

Now, let me explain WHY I hate them so, and why they are the most disgusting creature on the face of the Earth.


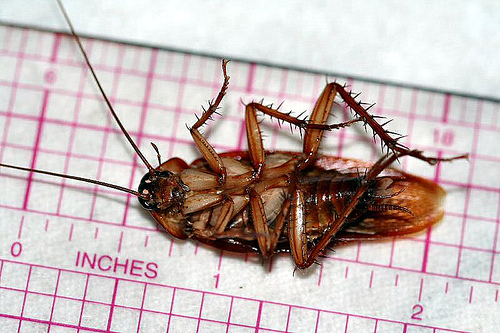
1: Their FREAKISHLY large size – The image above shows the actual size of one. Think that’s an exaggeration?


I KID YOU NOT

2: Not only are they GROTESQUELY LARGE, but they fly, thus giving them a definitive advantage over you and your piddly little self that’s grounded. And they will seek out height, coz they know you are incapable of defying gravity.

Ok that’s not a big deal right? You can still squash them and step on them when they’re on the ground….. THINK AGAIN.

3: They are supernatural. I am not shitting you when I say this. I have smacked them with shoes, and watched them disappear into thin air on plenty of occasions. They have the ability to crawl at alarming speed. And IF THOSE things aren’t bad enuff, IVE EVEN severed their heads and watched them walk off with my own two eyes.

4: Oh no, I’m not done. Not only are they SUPERNATURAL… but theyre intelligent. They lie in wait and plot ambushes. As mentioned already, it will seek height to foil your plots to destroy it – or it will run and hide in places where you cannot get to it. If you missed it with the shoe, and it managed to get away, you are in deep shit now. The only thing you can do is stare at the walls all nite long, don’t sit back in your chair… and while Im not a fervent believer in God Almighty, PRAY…. coz its staring at you…. from a place you don’t notice it staring at you… waiting for the perfect moment to lunge itself at you, with its horrid wings, and land on you with its extreme grossness. It happened to me once.

5: Just like the cockroach…. IT CARRIES DISEASE. And if they happen to harbor up and take residence in your cabinets, they leave lovely droppings everywhere. With a normal roach, they’re miniscule in size — with palmettos, they are nearly the size of rat droppings. Unlike the common roach tho, they don’t necessarily live in houses or stay for long periods of time, and are not a sign of an unkempt household. Palmettos generally come in when its cold outside, or otherwise, raining a lot. They seek the warmth of the house, and usually surface inside, near water sources — the kitchen around the sink, or in the bathroom, most commonly.

Ive been plagued with these bugs my entire life. And it comes down to one thing when dealing with them – KILL OR BE KILLED. Or grossed out by it touching you anyway and possibly bitten by its freakishly large mutant mouth. Ive never been bitten myself but…. Ive heard… stories O.o

I sat and watched my poor mother do battle with one when I was about 10 yrs old, which was in the living room…. me, freaking out and screaming on the couch. And sadly… the first couple shots she took, she MISSED. What did it do?? IT FLEW and LANDED ON HER BACK. Then I watched in utter awe (mouth prolly agape, even tho when a Palmetto is involved, an open mouth is never a smart idea LOL) and I saw my mom turn into SHE RA and rip her godamn shirt right off herself LOL I don’t need to tell you how friggon hilarious that was, and the poor woman never lived it down for as long as she lived. But as funny as it is, it also carries a more serious message with it that should not be ignored — do whatever you have to do to kill the damn thing. Lest you be left with the PTSD recurring from the damn thing touching you.

Another most notable battle. In my old house, it was a dark and stormy night…. ok… not stormy lol but dark anyway. And there must have been a female letting off pheromones in the house, because…. I am not playing….. we had to kill like 50-100 of them. They just KEPT coming. It got to the point where we were killing them so much that nite, we started doing so with STYLE! Half turn and smack! Smack one on the wall and it just neatly dropped into the toilet! I even threw a can of shaving cream at one haphazardly and killed it dead. And one of my dogs was even taking part in the killing, as well.

Ive gotten to the point where I will let any other bug live… EVEN SPIDERS (as long as they’re not dangerous types) except the palmetto. If I see one, murderous rage sets in, and I must set out to destroy it…. lest I not sleep that nite while its alive in my house. Ive even gotten inventive about how I kill them…. Ive drowned them in boiling hot water…. Ive squashed them, sliced them in half with butter knives…. Ive shoved them down drains and drowned them in bleach. I DO NOT play games when it comes to them. And nothing brings out my violence more LOL

And the reason for this rant? In the last week and half, like 10 have been killed. I just had one CRAWL out of my purse in the bathroom (I smashed its brains in for having the gaul to touch my purse) Ive gone THREE FRIGGON YEARS in this house, and barely an incident with any. Now all of a sudden, its like they’re taking over. So now its all out war… and godammit, I’m going to win…. coz I have something they don’t — POISON! AND lots and lots of CAULK!!!

So let this be a warning to ANYONE who hasn’t a clue what it is – if you see one, don’t ask questions…. just kill it.

This public service announcement has been brought to you by DI – if its a palmetto, it should DIE!

2012
03.11

Godspeed

Release Date: March 2012
Store Product Page: Godspeed
_______________________________________________________

________________________________________________________


Hermes was the Greek messenger to the Gods, as well as patron to Alchemists, Merchants and Thieves. Known for his fleet-footed sandals and Helm (each which had wings and enabled flight) he was able to carry messages to the gods or mortals with a quickness, and accompanied new souls to their place in the Underworld. He also carried a special staff with two serpents entwined, known as the Caduceus (which has been erroneously used as a symbol of Medicine for centuries)

Includes full Greek armor built for a god of speed and flight, complete with wings and a Spartan styled Helm with real fur. Also includes the Caduceus, which boasts special effects worthy of an Olympian, and poses which work with the Caduceus.

===== LIST OF CONTENTS: =====

Godspeed Armor
* Armor
* Bracers
* Helm
* Sandals

MATS for Armor
* Olympian God (White and Gold)
* Hermes (Teal and Silver)
* Utility MATS that turn off wings on all applicable items
* Utility MAT – Armor Straps Off
* Utility MAT – Helm Hair Off

Caduceus of Hermes Prop
* Short Caduceus (Left and Right Hand)
* Long Caduceus (Left and Right Hand)

Caduceus Mix and Match MATS
* Crystal-OFF
* Crystal-Blue
* Crystal-Green
* Crystal-Magenta
* Crystal-Orange
* Crystal-Purple
* Crystal-Red
* Crystal-Turquoise
* Crystal-Yellow
* Metals – Gold&Silver
* Metals – Pewter&Bronze
* Metals – Brass&Copper
* SFX-OFF
* SFX – Blue&Purple
* SFX – Green&Orange
* SFX – Purple&Red
* SFX – Red&Yellow
* SFX – Turquoise&Green
* SFX – Yellow&Turquoise
* Staff-GlowBlue
* Staff-GlowGreen
* Staff-GlowMagenta
* Staff-GlowOrange
* Staff-GlowPurple
* Staff-GlowRed
* Staff-GlowTurquoise
* Staff-GlowYellow
* Staff-SolidBrass
* Staff-SolidBronze
* Staff-SolidCopper
* Staff-SolidGold
* Staff-SolidPewter
* Staff-SolidSilver

Poses for M4
* 5 Long Caduceus Poses (Left Hand)
* 5 Long Caduceus Poses (Right Hand)
* 5 Short Caduceus Poses (Left Hand)
* 5 Short Caduceus Poses (Right Hand)

===== MORPH LIST: =====

Clothing Morphs:
* Morphs ++ (Fitness, Thin, Young)
* Elite (Adonis, Spartan, Svelte)
* Adjustment Morphs on All
* Sit 1 & 2, legs bend fwd, back and side on Armor Skant
* Wing Movement Morphs On Helm and Sandals
* Wing Style Morphs on Armor (chest piece)

Caduceus Morphs:
* Snakes – Cobra and Viper Heads
* Snakes – 5 Formations
* Snakes – 10 Tongue Movements
* SFX – 10 Movement Morphs
* SFX – Twist 1 and 2
* SFX – Flare
* SFX – Longer and Shorter
* Wings – 10 Style Morphs
* Adjustment Morphs (Snakes Smaller, move up and down on staff)

===== INSTRUCTIONS: =====

..:: CLOTHING ::..
Browse to your Runtime:Character:Godspeed Folder, and here you will find the CR2 to load the clothing pieces (4 in all) Double click the icon and it will load zeroed in the scene. If you are using DAZ Studio, the files will be located in the Runtime Folder, in the same location as noted above.

To conform the clothing, load the item, go to the top of poser under the drop down menus and click on Figure. A new menu will open which will say conform, click that and then conform to and a new dialog will open with its own dropdown. Select Michael 4 and hit ok, and the item will load onto M4 (alternatively in DS, right click on the item and click “fit to” then select M4 in the list – but it should auto-conform in DS anyway) You will need to do this for all the figures. From there, you have a ton of morphs to play with, including adjustments which will fix pokethru, movement and style morphs on miscellaneous pieces, which will change how the figures look and move (note: dialing in morphs ALWAYS work best by dialing in on the BODY actor)

There are also MATS included for the clothing – there are two full mats: Olympian God and Hermes. There are also utility mats that turn off certain things on each item, for versatility.

..:: PROPS ::..
To locate the props, go to your props folder and find the Godspeed Folder. There you will see four files: Long Caduceus Left and Right Hand, and Short Caduceus Left and Right Hand. To load each, simply double click the icons. They will parent to M4’s hands, and the poses that are included work with the Caduceus (covered later in this wiki) The Caduceus has many morphs on it, to change the heads to cobras and vipers, movements and formations, etc. There are also adjustment morphs that will help combat collisions with the snakes on the longer staff, when using poses that are not included with the set (such as moving the snakes up and down on the staff, or scaling them down, etc)

There are also mats for the Caduceus included. These are located in your pose library (in the Caduceus MATS folder) as well as your Materials library, in the Godspeed/Caduceus MATS folder. I have included both MC6 and PZ2 mats, simply because, PZ2’s don’t work with props and require an actor to be loaded in the scene (so if you are using the staff alone, you must use the MC6 mats) These MATs are also mix and match, so you can mix your choice of colors or metals, etc.

..:: POSES ::..
There are also 20 poses included in this set, which were designed for use with the different versions of the Caduceus that are included. To use, first load the prop, then use the pose for perfect alignment (otherwise, the pose will not pose the staff properly) It’s important to use the correct prop for which the pose was intended, so perfect alignment can be acheived. To locate the poses for M4, you will need to go to your pose library, into the Godspeed/Poses folder.

1-5 are for the Right Hand Long Caduceus
6-10 are for the Left Hand Long Caduceus
11-15 are for the Left Hand Short Caduceus
16-20 are for the Right Hand Short Caduceus

For a full instruction guide, Ive written a tutorial that has been included with the set in PDF format. This will explain everything in deep detail, and walk you through getting the best out of this set.

===== OTHER NOTES: =====
Color coded and labeled templates for all figure is available, so you can make your own textures.

Outfit has blank channels for custom morph inj support

The thumbnails for the pose and light files are the standard 91X91 resolution, so that they will show properly in DAZ Studio. If you are a poser 5 or higher user and prefer the larger thumbnails (which are 125×125 in size), you can download them here: Godspeed Thumbs

Please Note:
Bigger thumbnails will NOT work in DAZ Studio, nor lower versions of Poser, so only download these if your using Poser 5 and higher.

Instructions to install larger thumbnails:
These are set up to the same exact locations as the original sets thumbnails. To install, simply unzip it to your Poser Runtime, and overwrite the old thumbnails.

KNOWN ISSUES
The hair on the helm is a bit render intensive when using raytraced shadows. Longer Render times should be expected (but not horribly long)

For more information on the set, how to use it and combat things you may encounter, please refer to the PDF included in the set.

Technical Support is always available. If you have questions that need answers, feel free to email me — IgnisSerpentus@damageinc3d.net

2012
03.10

What I think of Genesis

Ok, so now that I actually HAVE experience working with Genesis, I wanted to write a blog on what I think about the new tech from a development point of view (not a user end, to be clear) As always, nothing is entirely cut or dry… there are pros and cons to everything. This is no exception. Basically, this is to help you guys made an educated decision on whether or not you want to support it. And it might actually help you with it, should you decide to dive in (granted, its not a tutorial, but it gives you some basic principles to apply to actually working)

Making Clothes: Its Easier –
From a development standpoint… well…. yes and no.

Getting the outfit in and rigging is pretty brainlessly easy compared to poser (providing you use the right options to turn it into conforming clothing, that is lol) If you modelled it to Genesis, then it will already automatically fit (whereas, Poser is a little on the retarded side, and automatically scales the object up on import – so u have to scale it down, move it about and fit it to the figure, before you even rig it)

But there are also things which aren’t necessarily easier or save you time.

First thing is with the dynamic morphs it spawns to fit the clothing automatically to Genesis (no matter what shape u put on Genesis) It WILL save you some time, in situations where the dynamically spawned morphs happen to be perfect. Any that don’t happen to be (if you wish to support them) must be replaced, so you will still have to do morphs, regardless – just most likely less than you would if you had to make ALL of them. And you will still need adjustment morphs (or at least, theyre a good idea) And you may still need JCM’s for certain occasions.

Also, any hope of converting morphs over from your M4/V4 rig is a fallacy. If you’re the type to a buttload of movement morphs, or styles, you will have to redo them all – and by eye, as closely as you can get them to the originals (for fear of them being too different) Reason being…. if you have to change the base objects to fit Genesis (and you will, always, for best results) then using any morphs spawned for the original, will cause them to morph back to the M4/V4 shape, size and placement. The only way this will EVER work, is if somehow you have a way to resize/fit all the morphs to match the Genesis clothing base shape, perfectly (and I mean, down to the decimal) I don’t know of any way to do that, perfectly. And well, that would be a mammoth undertaking, besides. So either way you look at it, its more work. But redoing morphs may quite possibly be the lesser of evils, there.

Finally, the smoothing is intended to actually fix certain things and make other things fit better. And it does. But the smoothing also wreaks havoc with certain features of your clothing — example, the set Im working on now – the hair on my helm is actual hair made with ZBrush fibermesh, and when I add the smoothing, it thins it out drastically. I don’t like that, so smoothing is off completely. I also had to practically remove the smoothing and mess with the weight of the smoothing from my Sandals coz it, combined with the rig, caused the straps to shove into the sandal edging. So, you will have to mess with the smoothing, collision iterations and weights on the smoothing to get a good result. The problem is… when u turn those things down (or otherwise, off completely) to account for certain things, it will make the dynamic morphs imperfect (thus forcing you to replace any you wish to support) That could only be a few…. but could also end up being ALL of them (depending on the item) So will that happen to you? It depends on whether the planets align a certain way lol There’s really no way to know for certain how its gonna act up, to model around it. Perhaps in some instances, but certainly not all.

That’s not even getting into things I haven’t experienced, coz the rig would be different, have ghostbones or extra pieces or whatnot (for good and bad)

So basically, when you go to rig something for Genesis that started out as a Gen 4 product, plan that you will have do a fair amount of work to get it converted. Granted, you already have the mesh built (which then needs to be fit to Genesis) its already mapped, already textured, and possibly even already has DS MATS (if you do them for your Gen 4 packs) You even have some of your thumbs already done (at least, ones that will feasibly not need changed) So that all does save time (but really, only coz you already did that stuff anyway for Gen 4 or whatever) But speaking in terms of only what DS will generate for you, there’s still a good amount of work involved.

Also keep in mind… it goes easier if you have experience with traditional rigging to boot, and adjusting jp’s, falloffs and such. Because its similar (not exact, but there are similarities there for sure) If you haven’t, the learning curve may be harder for you – or it may be easier, as some people do take to things rather naturally and maybe this will click with you better. But as DS4 uses traditional rigging as well as weight maps, you will kind of have to learn it all (unless you have no intention on using the traditional rigging stuff)

Projection Templates: Can be really handy, but be careful –
Its a cool way to get a basic weight map rig for something. So, if you have a dress, use the dress option. If you have gloves, use the gloves option. But if you use the WRONG something, your rig will be fubared LOL Case in point: I used the bodysuit on a pair of sandals, instead of the boots (which weren’t working right for me) not fully thinking it thru (that doh! a bodysuit would have no feet) I noticed later, the feet wouldn’t fit right and had to re-run it thru using no template, then fix the weight map joints manually. Just make sure that the projection makes sense for what you are doing – and if there doesn’t seem to be anything that matches correctly by item (or as in my “sandals rigged as boots” case, is not exactly right) then use nothing at all when you set it up (this will pull the rig from Genesis entirely, and take nothing into account on how a certain something would be rigged)

The Weight Map Brush: HATE IT –
Ok, this isn’t a bad thing for DAZ or DAZ Studio… just a personal dislike, really. I wouldn’t use it in C4D, either… coz I don’t like it at all. In fact, I find better results just selecting stuff in DS and filling in the weight at 0 or 100, or smoothing by that selection. The weight map brush makes me mental… it’s a slow and laborious pain in the ass. Seriously. It’d be okay for little or minor things and I use it for that stuff, but… ugh… Ill be avoiding it for the most part.

What really IS EASIER: MORPHING! –
What I will say that I like… and I mean REALLY like – you don’t have to have a grouped mesh to use for morphing. It can be grouped however you want, whether by certain pieces in a grouping, or one single group, even (it only needs to be the same exact mesh) Which is actually REALLY helpful. So you can export your mesh from DS with groups and materials attached. Take it into UVMapper, and group it to how you want (either by using the existing groups, or by material) and save them as new groups (whatever you want them to be)

With traditional rigging, you always had to follow your grouping being in tact to how it was in Poser or DS, and you couldn’t change any of the grouping, for the full body morph to work properly (coz you’d get the incorrect number of facets error) When you are trying to get at certain pieces that are made up of several pieces (but you want to grab them collectively – like wings, for example, that would be a collective made up of several feathers) its really hard. Fortunately, in Z you can mask stuff using the scale tool and a couple buttons, to account for it… But you have to do it topologically for every single piece of that something thats going to be in the mask (and if you have 50 pieces in that masking, you can imagine the pain) But its EASIER and TIME SAVING not to have to mask at all – to already have the mesh grouped the way you need it to be, so you can flip the “mask by grouping” switch in Z and grab entire pieces.

The Grouping Tool: Brilliant and Not so Brilliant –
Well, its not a deal breaker or anything – just has pros and cons to it like anything. I will say it is eons better than the Poser grouping tool, however. You can use lasso selection, select individually by poly, or rectangular selection. You can grow and shrink the selection you make. And it works really good. But…. it also selects THRU the mesh. So while you may be thinking “Oh, Im only editing this one little piece” you may actually be editing a selection that went thru that piece, and is including other parts of what you are rigging. So you have to be careful with the selecting, and make sure its on an angle, or otherwise, can’t select thru onto other parts of what you’re selecting. It would also be really cool if you could add to or remove from from a selection you already made, by holding shift or something and selecting again (although, maybe you can some other way, and I just don’t know how)

A common Misconception: Everyone can do it, with Auto Fit! –
Well, even I am guilty of this one. When the tech first released, I thot the fact it was sposed to be sooooo easy and had Auto Fit to boot, would completely kill any need to even bother with Genesis clothing. The end user could just veritably convert whatever they want. Why bother doing an addon they won’t pay for. But I soon discovered… that was a gravely wrong assumption.

Auto Fit isn’t perfect. Because its essentially trying to fit an outfit thats modelled to Gen 4 content, to a completely different shape. And then the morphs further complicate that, by deforming it further from its base shape. The result? Crunching, crinkling, distortion and general yucki-ness. Sure, you can get by with AF – but its never going to be perfect (though it could get better as DAZ improves it) You also lose any adjustment/movement morphs the original outfit might have had (though, there is a way around this using the transfer tool)

That, coupled with the fact there is some work involved even in modelling it to Genesis, and time it will take to learn the new tech, and you have very good reasons why its not as simple as just that.

Poses: the Bane of my Existence –
But after posing in DS, they’ve become more of a bane of my existence. You see, in Poser, when you make poses intended for a prop, it will actually save the prop inside the pose file. So you can move the prop around however you want with a pose, and save that pose. The prop will automatically place as you moved it. This is helpful for tricky poses, where the prop may otherwise intersect with the figure (esp if you want both hands on the prop) Its also handy if you want the prop to face a certain direction (you can just spin it to face the camera, always, so the features stand out) So, in poser, you can just move it about for that pose, save it, and it will work perfectly as you intend it to.

Unfortunately, DS4 doesn’t save the pose with the prop rotation/translation settings. So, basically, your parents must work for ALL the poses. You can’t move them, or twist them to face the camera. This makes me mental…. and makes doing poses harder. In fact, I may even submit it as a suggestion to DAZ for future feature inclusions.

I will say that in some ways, I like posing in DS more and less, than Poser. Really, both apps have their  pros and cons there


Now, for the rest, I will have to leave that for another blog, as I am only covering what Ive experienced thus far. I have yet to create a character (fully custom or otherwise) using Genesis (that is actually next on my list) so I couldn’t honestly tell you how painful or not that is. But there is more to this tech… much, much more. I will have to cover that in a part 2.

So, will I continue on the Genesis path? Well, for me, its not as simple as yes or no – but rather Yes and No. Given that to do both sides is rather lengthy (and some of my packs can be rather massive) I may not support both interchangeably … but rather one or the other, in some cases. And probably on smaller things, simultaneously. I will definitely be doing more Genesis content, tho, as well as Generation 4. You just might see me bounce around a lot 🙂

2012
02.05

Why Zombies are bogus Rant

So, I’ve thought about the Zombie thing a lot lately, being that I watched Zombieland (for the hundredth time) as well as Resident Evil: Afterlife for the second time. I have some serious questions regarding the plausibility of this disorder. In fact, so much, that I’d rather believe in the tooth fairy…. or Santa Claus.

1: If zombies are mindless, how can they have the cognizance to chase their prey – and not just chase them, but chase them by cleverly figuring out ways to infiltrate man-made things. I know that some animals are clever… but they have fully functioning brains.

2: What about the Zombie virus causes Zombies to want to eat human flesh? It cannot be primal instinct — its not in nature to eat one’s own kind – not even animals do it for the most part. So it must be viral. But why human flesh only? And not just flesh in general. And why human brains? Not just brains in general?

3: Why don’t Zombies turn on each other and eat themselves, if they want meat? Arguably, you can say, well they want FRESH meat — but if that were the case, medically speaking, flesh takes 3 to 5 hours to start to decompose, which is enuff time for them to get eaten by their own brethren as soon as they were turned by other Zombies, thus killing off themselves before they can even become mindless, limping maneaters.

4: Again, going back the mindless thing…. if they are all duh…. how the hell do they know when a Zombie is a Zombie, and a human is a human (enuff not to eat their own kind) Even if they can smell, their dumb broken brains wouldn’t know dead meat from live.

5: Zombies are sposed to have a lack of motor skills – like to climb trees. I would presume its part of them being stupid and shit. Yet, you see them wielding weapons (as in the case of Resident Evil) or even climbing amusement park rides.

6: If they are “dead” how do they walk? What keeps them going, without blood circulation? And how  do their muscles not atrophy without blood circulation? Without muscles, you can’t walk… without blood you can’t have muscles.

7: Going one further on the last – Same thing with mastication, so they couldn’t FEED on shit. Look at people who are catatonic or otherwise, comatose – they can’t eat on their own… they have to intravenously.

So… in close… I call bullshit on Zombie-ism.

2011
12.04

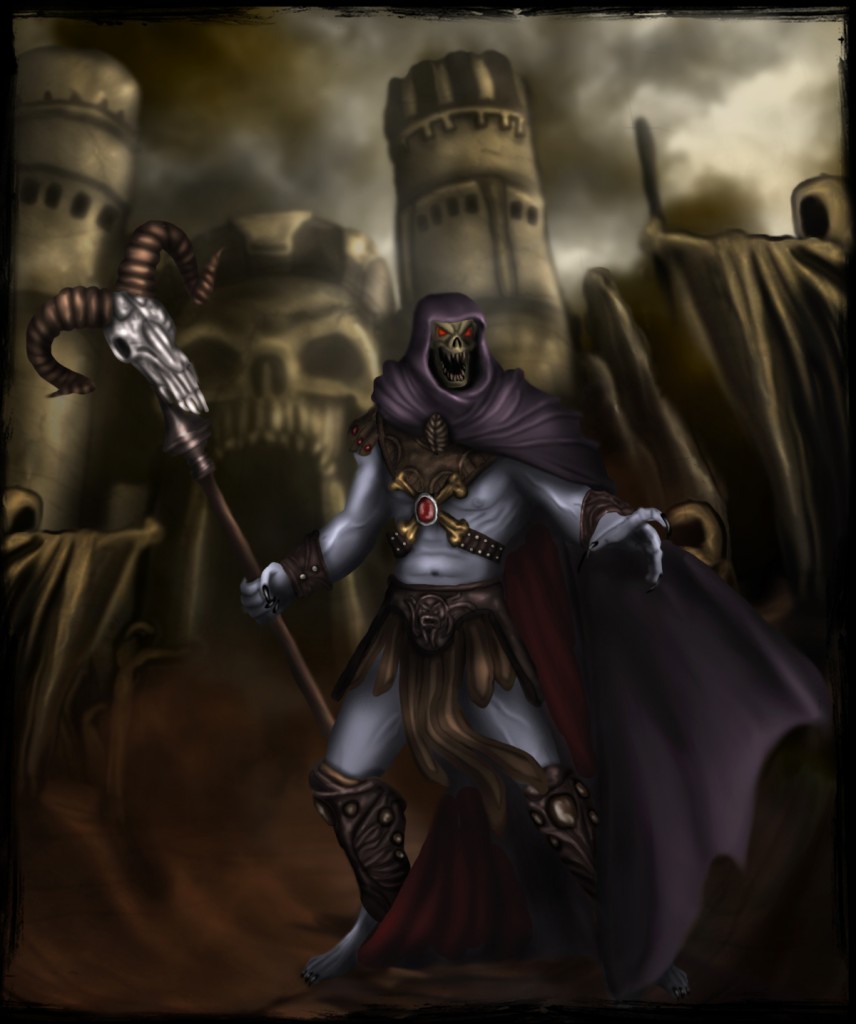
Skeletor

So, posting that pic of Skeletor on here yesterday made me want to paint a pic with him in it LOL

So here he is, with Castle Grayskull behind him.

This one is fully painted in Photoshop


2011
12.03

Why I am EVIL

I suddenly realized why I am so dark and evil…
Its coz I grew up playing with this:

No matter how old I get, Skeletor STILL kicks ass.

2011
12.03

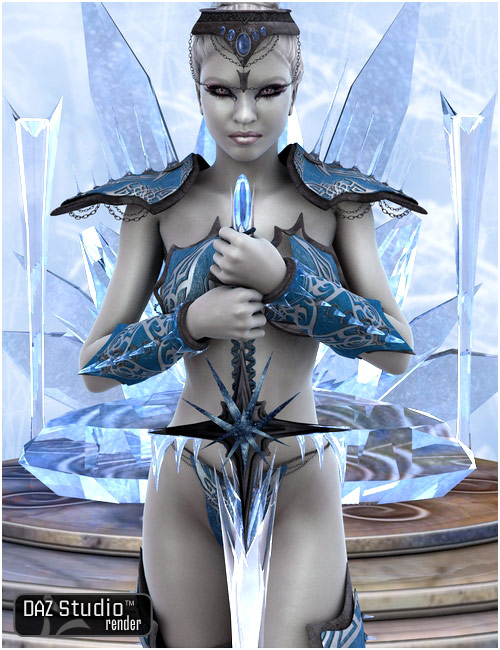
Frostbite

Release Date: January 2008
Store Product Page: Frostbite
_______________________________________________________


There once was a great Queen, who ruled the Arctic North with her King by her side.

But the untimely death of her true love turned her heart to ice.

Soon, a transformation would begin; one that would change her into the most wicked and powerful being ever.

Harnessing the power of cold death and hail fire, she now reigns supreme as the ultimate form of doom.

===== LIST OF CONTENTS: =====

Frostbite Character
1 Partial Custom/DAZ Dialed Head INJ/REM
1 DAZ Dialied Body INJ/REM
1 Default Skin MAT
10 Makeup Options (Natural and Fantasy)
8 Eye Options (4 Natural and 4 Fantasy)
2 Eye Reflects, Off Option as well as Tears off and on

Conforming Clothing and Armor
Bikini Top
Bikini Bottoms
Bracers
Shin Guards
Thigh Guards

Props Included
Pair of Pauldrons
Crown, with 5 Other Prop Options (Snow Leopard Fur, White Peacock Feathers, Headplate, No Chains and Tiara)
Hailstorm, the Sword of Ice
Ice Throne

Poses Included
5 Poses with the Sword
5 Poses with the Throne
5 Poses with the Sword and Throne

10 Lights Included

===== CLOTHING MORPH LIST: =====

{{http:www.damageinc3d.net/Promos/Frostbite/MorphList.jpg}}

===== POSER INSTRUCTIONS: =====

..:: USING THE CONTENTS ::..
As this set uses V4.2, Morphs ++, Aiko 4 and Elite, to load the character, you must first load Aiko 4 into your scene. Make sure she is selected, then browse to your Pose Library, then Frostbite, and you will see all the options. Morph options load all morphs, and there is a pupil dilate morph included, to shrink her pupils for use with the fantasy eye mats. The apply all skin option, loads all default mats (and this you will want to load first, before applying any of the other mats) From there, you may choose the eyes you wish to use, as well as makeup options. Keep in mind, the head morph partially contains a customized morph. The deltas are included in the pack – do not delete them, as the morphs cannot work without them.

The Clothing and Armor included are conforming items, so they will load onto V4, to move and bend with her. To locate these figures, you need to go to your figure library and find the Frostbite folder. To conform each one, load the item, go to the top of poser under the drop down menus and click on Figure. A new menu will open which will say conform, click that and then conform to and a new dialog will open with its own dropdown. Select Victoria 4 and hit ok, and the item will load onto V4. You will need to do this for all the figures. Also, keep in mind, to avoid pokethru, it is best to use the Magnetize clothing to V4 poses, which are included with V4 when you purchase her. Further instruction is explained in the tutorial included. The clothing also has a myriad of standard DAZ morphs, so you can fit it to your own characters. Each also has a special Frostbite morph, so that it will fit to her perfectly.

The Props included are many. The first you will see in the file list, is a pair of pauldrons. These will load onto her shoulders, and the ice spikes on them morph long or short. Next in the list, you will see the Crown and a bunch of options for it. The crown is designed to not only act as armor, but also as just a crown. The armor style crown loads with chains and a noseplate on it, and it has an open top. You can choose to use the peacock feathers, snow leopard fur or a metal headplate to close the top (or alternatively, use a pony tail style hair) There is also a no chains option, which transmaps out the chains entirely, should you want them off. The final option for the crown is a tiara style, which flips the crown upside down (for more of a Queen style crown, instead of armor) You can use the other options (fur, feathers) with the tiara style, but they are not designed to work with the tiara, so you will have to make adjustments to make them fit. Next in the list of props, you will see Hailstorm, the Sword Of Ice, which is designed with icy elements. The sword parents to both hands, and works with the poses included. Finally, the last prop… one which no queen would be complete without — a throne of Ice. The throne is designed to look very icy and cold, and the snow globes on the pillars actually have snow in them. It even includes a special light, to make it look extra icy. The throne also has poses which work with it and a light made specially for it.

There are 15 poses for V4 also included, which work with the Sword and Throne. The ones that show the sword require the sword be loaded first, before posing. The thumbnails depict which proper hand to load. The poses are also designed for the throne, but the throne is not parented as the sword is. Instead, the poses work with the throne at 0. In order to move the throne back, you can use the camera or alternatively parent the throne to V4’s hip, then move her by her hip back. Instructions are included in the tutorial

Lights included (in your Light Library/Frostbite) are designed to set off the shaders in the character mats. There is a mix of spotlights and brights, in many different colors. There is also one extra light included, which was created for the throne. This light was created in such a way, that it reacts with the throne, to make it look extra icy and transparent as if light were shining through it.

===== OTHER NOTES: =====

A complete PDF Tutorial is included in the set. This will install to your Runtime folder, under Tutorial (Frostbite.PDF) It elaborates on instructions, and theres added tidbits you can read at your convenience.

Aside from the character shaders not translating over properly, as is always the case, this set will work beautifully in DAZ Studio. Some adjustments may be necessary, since I have not included separate MATS for DS.

Color coded and labeled templates for all figures and props are available, so you can make your own textures.

Conforming Outfit and Armor all have blank channels, so you can make your own custom morphs and inject them simplistically.

The thumbnails for the pose and light files are the standard 91X91 resolution, so that they will show properly in DAZ Studio. If you are a poser 5 or higher user and prefer the larger thumbnails (which are 125×125 in size), you can download them here: Frostbite Thumbs

Please Note:
Bigger thumbnails will NOT work in DAZ Studio, nor lower versions of Poser, so only download these if your using Poser 5 and higher.

Instructions to install larger thumbnails:
These are set up to the same exact locations as the original sets thumbnails. To install, simply unzip it to your Poser Runtime, and overwrite the old thumbnails.

KNOWN ISSUES
The membrane eye mat does not work with the eye reflections. It is for this reason these eyes have shaders on them, to make them look glossy.

As covered in the Tutorial included, when using the conforming clothing in Poser, you may need to use the Magnetize clothing to V4 poses (which come with V4) so that absolutely no poke thru will occur. The tutorial explains this at length, and walks you through how to do this.

Technical Support is always available. If you have questions that need answers, feel free to email me — IgnisSerpentus@damageinc3d.net

2011
12.03

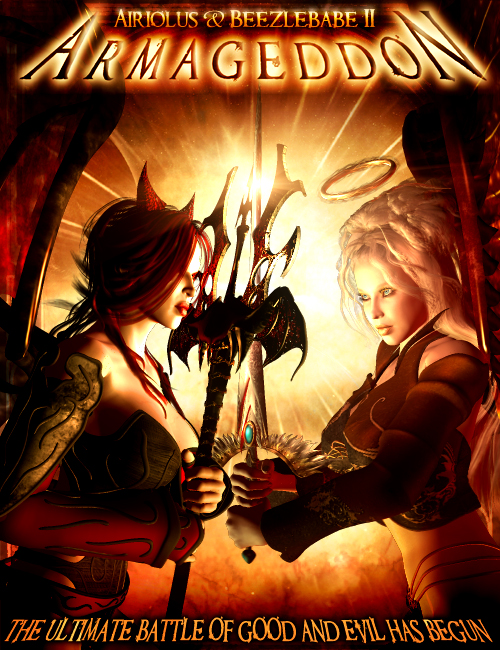
Armageddon: Airiolus & Beezlebabe II

Release Date: November 2008
Store Product Page: Armageddon
_______________________________________________________

________________________________________________________


Armageddon is the sequel to Airiolus and Beezlebabe, a pack I did a very long time ago. After three years since the first, I finally decided to do a sequel that contained everything I could not acheieve in the first pack, since it was one of my first packs ever. Upgrading it meant including posable figures, better weapons and an explosive amount of killer options, which are sure to make exploring both sides way more fun than the first pack.

The story follows The Archangel, Airiolus and the Demonic Beezlebabe, as they do battle against one another. But in this story, Armageddon, it is the final battle of Good and Evil – and the prize is dominion over Earth. Airiolus will also discover a shocking secret – that the evil vamp, Beezlebabe, is also her sister. Will Good or Evil prevail? That is up to you to decide.

===== LIST OF CONTENTS: =====

Airiolus and Beezlebabe Characters
2 Partial Custom/DAZ Dialed Head INJ/REM
2 DAZ Dialied Body INJ/REM
2 Skin MATS (For Airiolus and Beezlebabe)
10 Makeup Options (5 For Airiolus, 5 For Beezlebabe)
6 Eye Options (3 For Airiolus, 3 For Beezlebabe)
2 Eye Reflects, Off Option as well as Tears off and on

Posable and Conforming Figures
Angel Wings
Demon Wings
Easy Pose Devil Tail
Also includes 3 MATS For each pair of wings

Props Included
Citadel Of Light Architecture
Optional Eternal Light Effect for Citadel
Halo (With both Glitter and Lightning Effects)
Sword (With Right and Left Hand Parents)
Fortress Of Hellfire Architecture
Optional Hellfire Rising Effect for Fortress
Horns (Both Red and Black Options)
Pitchfork (With Right and Left Hand Parents)

Poses Included
10 Poses for Airiolus, which work with the Sword
10 Poses for Beezlebabe, which work with the Pitchfork
5 Poses for Angel Wings
5 Poses for Demon Wings
10 Poses for Devil Tail

Lights Included
5 Bright Lights for Airiolus
5 Dark Lights For Beezlebabe

===== POSER INSTRUCTIONS: =====

..:: USING THE CONTENTS ::..
To load the characters, you must load V4.2 into your scene. Make sure she is selected, then browse to your Pose Library, then Armageddon, and you will see all the options. Morph options load all morphs, Apply All Skin options are there for both characters as well (and these you will want to load first, before applying any of the other mats) From there, you may choose the eyes you wish to use, as well as makeup options. Keep in mind, Airiolus’ skin is very different than Beezlebabe’s, so you must load the corresponding mat options, or they will not match. Also keep in mind, their head morphs partially contain customized morphs. The deltas are included in the pack – do not delete them, as the morphs cannot work without them.

The figures included ALL pose and conform to the characters. Airiolus has her pair of Angel wings, and Beezlebabe has a pair of Demon Wings and an Easy Pose Devil Tail. To locate them, you will find them in your figures library, in “Armageddon” Double click each icon to load, and they will automatically be selected in the scene. Go to the top menus of Poser, under figure/Conform To, then select V4 in the dropdown list, hit ok and they will load to the correct locale on her body.

You will also notice in the Pose Library that there are MAT options and poses for the wings, as well as Poses for the tail. You must select the wings or tail in the scene, and click each icon to load. The V4 Poses are labeled with which hand parent to use for the weapons.

The Props included are many. There are two pieces of architecture included for each girl – a dark one and a light one. They also each include an optional prop to make a burst of eternal light, or rising hellfire appear on the prop as a special effect. These will load in place, once you load each piece of architecture, as they are parented to the corresponding props. Continuing on, each girl also has head gear, naturally, as an angel and devil are supposed to have. The Halo included has two material options, with Glitter and Lightning effects. The horns come in both Red and Black. These load to V4’s head, since they are parented, as well. The last set of props each girl has, is a weapon. Airiolus has a Sword of Righteousness, while Beezlebabe, naturally, has a Pitchfork. These props include both Right and Left hand parents, and are also saved with the poses for V4, so they will position perfectly when using them — in order for this to work, you must load the props first and then click the pose.

Lights included (in your Light Library/Armageddon) are designed to set off the shaders in the character mats. For Airiolus, we have 5 bright lights and for Beezlebabe, we have 5 dark lights. To load, simply click on the icons.

===== OTHER NOTES: =====

A complete PDF Tutorial is included in the set. This will install to your Runtime folder, under Tutorial (Armageddon.PDF) It elaborates on instructions, and theres added tidbits you can read at your convenience.


Aside from the character shaders not translating over properly, as is always the case, this set will work beautifully in DAZ Studio. Some adjustments may be necessary, since I have not included separate MATS for DS.

Templates for all figures and props are available, so you can make your own textures.

The thumbnails for the pose and light files are the standard 91X91 resolution, so that they will show properly in DAZ Studio. If you are a poser 5 or higher user and prefer the larger thumbnails (which are 100×125 in size), you can download them here: Armageddon Thumbs

Please Note: Bigger thumbnails will NOT work in DAZ Studio, nor lower versions of Poser, so only download these if your using Poser 5 and higher.

Instructions to install larger thumbnails: These are set up to the same exact locations as the original sets thumbnails. To install, simply unzip it to your Poser Runtime, and overwrite the old thumbnails.

KNOWN ISSUES
The membrane eye mat does not work with the eye reflections. It is for this reason these eyes have shaders on them, to make them look glossy.

Technical Support is always available. If you have questions that need answers, feel free to email me — IgnisSerpentus@damageinc3d.net

2011
12.03

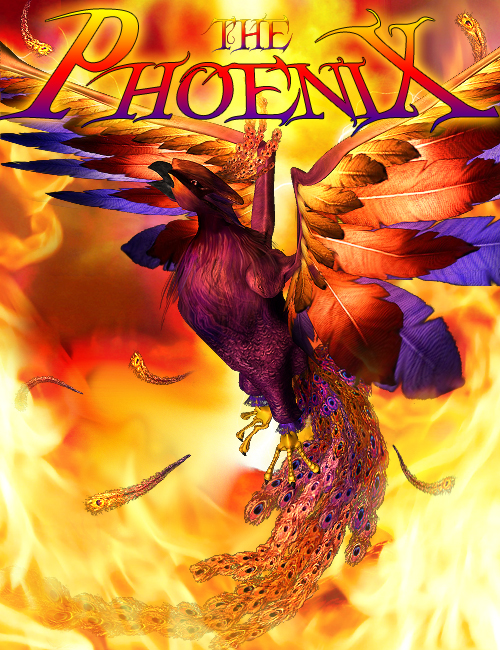
The Phoenix

Release Date: November 2009
Store Product Page: The Phoenix
_______________________________________________________


Regarded as a mythological bird symbolizing resurrection and infinite life,
the Phoenix would live a long life, only at the end, to burst into flames
And from the ashes that remained, a new Phoenix would rise

Harness the power of the Phoenix in your art

===== LIST OF CONTENTS: =====

Phoenix Posable Figure
5 Head Morphs
5 Beak Morphs (Ibis, Vulture, Woodpecker, Toucan and Parrot)
Left and Right Wing Muscle Morphs
Chest Feathers Longer Morph
Head and Tail Feathers are Easy Pose
Inverse Kinematics on Legs
Blank Channels for Pose INJ

Props Included
Golden Perch, for Tame Phoenixes (to go in a Wizard’ study)
Single Phoenix Feather with Morphs, for creating molting feathers

10 Poses Included
5 Poses of Phoenix Sitting
5 Poses of Phoenix Flying
Pose included that works with perch (closes his feet and sits him on it when zeroed)

Poser 5+ MATS and DS MATS Included

===== POSER INSTRUCTIONS: =====

..:: USING THE PHOENIX ::..

To locate and use the Phoenix, simply browse to the Phoenix folder in your figures library. There you will see him all ready to load (double clicking on the icon will do the deed)

The Phoenix is a fully posable figure created in the likeness of descriptions based on Phoenixes. That said, I have also incorporated other birds into him, to give him more versatility. This includes beaks of the Ibis, The vulture, The Woodpecker, The Toucan and finally, the Parrot. He also has 5 random head morphs to change his appearance. All of the head morphs load separately from the beak morphs, so they can be mixed up any way you want them. As for the other morphs that are included, the Wing Collars have muscle morphs, to beefy him up a bit (or you can opt for the daintier look) The chest feather plane also has a morph on it, to make it longer (thereby, lengthening the furry feathers that are textured onto it) The morphs are both PBM’s and FBM’s, so you can use the FBM’s that are on the BODY actor for the Beak and Wing Muscle Morphs, to save you the trouble of having to dial more than one bodypart.

Limits are set in the CR2 to avoid over-extension of the mesh, and unrealistic posing, but it will load in Poser with them off (I’ve made it optional) Should you wish to turn on limits in Poser, go to the drop down menus at the top, click on “Figure”, then check off “Use Limits” In DS, limits will be forced when you load him… to turn them off, click the small arrow at the top of the parameter dials, then click on “Limits/Limits Off (Rotation)” Also note, Inverse Kinematics are set up on the Phoenix’s legs, but they will not be on by default. This means you must enable IK if you wish to use it, by going to the Figure menu in Poser, then select Inverse Kinematics and select each leg (It will have a little checkmark next to each leg, when the IK is turned on)

Among the other features that are not so noticable, the Phoenix also has blank channels added for Pose INJ support. This means if you wanna make an add-on with your own custom morphs, you can do so by INJ, rather than having to include a PMD file. The blank channels are only set up on certain body parts, however — the head, the mouth, the body (for FBM’s) and both parts of the wings. If there are enough requests for it, I will be happy to add blank channels on all the bodyparts and submit an update (but for the moment, I only added them to the ones I morphed)

..:: USING THE PROPS ::..
To locate the props, go to your props library and find the Phoenix Folder. You will see a couple of props here. The first is a gilded perch for him to set atop of. I added this in for those who wished to render him in a Wizard’s study, something reminiscent of Fawkes in Dumbledore’s office. The second prop in this folder you will see, is a single Phoenix feather. I added this in, coz birds molt. So this feather, which has a multitude of morphs, was designed to mimick molting feathers you can randomly scatter in the scene (and also change each one’s shape, as no two feathers fall the same way)

..:: USING THE POSES ::..
I have also included 10 poses to get you started rendering him. 5 are of him sitting, and 5 are of him flying. One extra pose is included, and this pose works with the perch. It is a partial pose that only controls his feet (closes them around the perch) and will adjust his hip y trans to set him atop of the perch when it is zeroed. You can use it with the poses included, but adjustments will be necessary, as it will only close the feet and put him at level with the perch. Also note, all the poses were done with limits imposed.

Finally, this set not only includes Poser MATS, but also DS MATS for the bird and the props included. These are optimized… meaning, I worked on them personally to make them look as close to the Poser MATS as I could get them.

===== OTHER NOTES: =====

Color coded and labeled templates for all figures and props are available, so you can make your own textures.

The thumbnails included are the standard 91X91 resolution, so that they will show properly in DAZ Studio. If you are a poser 5 or higher user and prefer the larger thumbnails (which are 125×125 in size), you can download them here: Phoenix Thumbs

Please Note: Bigger thumbnails will NOT work in DAZ Studio, nor lower versions of Poser, so only download these if your using Poser 5 and higher.

Instructions to install larger thumbnails: These are set up to the same exact locations as the original sets thumbnails. To install, simply unzip it to your Poser Runtime, and overwrite the old thumbnails.

Technical Support is always available. If you have questions that need answers, feel free to email me — IgnisSerpentus@damageinc3d.net

2011
12.03

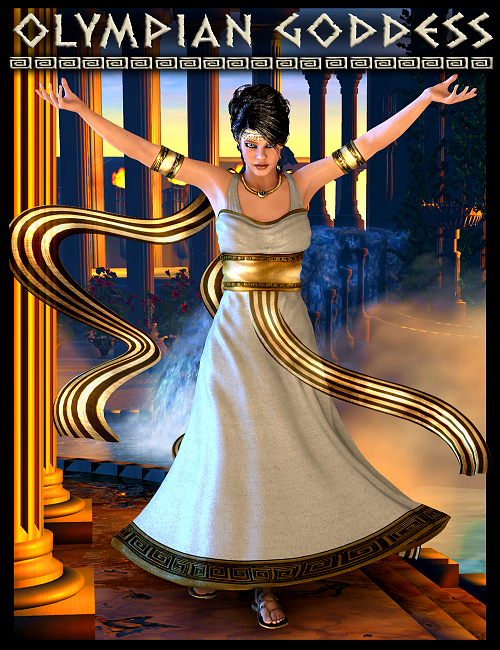
Divinity: Olympian Goddess

Release Date: August 2010
Store Product Page: Olympian Goddess
_______________________________________________________


This fully-loaded Grecian Dress was designed for one half of my Divinity Series, to help bring alive the Goddesses each represents. Each goddess released in the series will have accompanying textures for the dress.

===== LIST OF CONTENTS: =====

Olympian Goddess Outfit
Dress\
Chitons
Arm Cuffs
Laurel Crown
Omega Necklace
Lace-Up Sandals

MATS for Figures
Full set for all pieces
Bodyhandles Off Dress for DS
Bodyhandles Off Chitons for DS
Sash Off Dress
Chiton Pins Off Dress

===== CLOTHING MORPH LIST: =====
Hera
Amazon
Thin
Voluptuous
BreastsSize
BreastsLarge
BreastsImplant
BreastsNatural
HipsSize
GlutesSize
BellyThin
BellyThickness
Fantasia
Sylph
Utopian
Adjustment Morphs
Movement Morphs for Chitons

===== POSER INSTRUCTIONS: =====

..:: USING THE CONTENTS ::..
Using the contents of this set is pretty simple; just browse to your figures library and locate the Divinity Folder within. In this folder, you will find another folder titled “Olympian Goddess” In this folder are all the outfit pieces. Just click each one to load. To conform in Poser, go to figure/conform to and select Victoria 4 in the dropdown list, then hit ok. To conform in DS, simply left click on the outfit piece and hit “fit to” and choose Victoria 4.

All the pieces in the set contain many morphs, which are intended for Morphs ++ and Elite, as well as the characters from my Divinity Series. Aside from Fit Morphs, there are also adjustment morphs on all the pieces (which will further help combat any pokethru you’d encounter) Last but not least, there are movement morphs for the Chitons (how these work is explained in detail below)

You will also notice that there are 2 versions of each outfit piece in this folder. One is a normal version, and the other is labelled “SC” This stands for superconforming, and these will automatically dial in to match any V4 morphs (which are included morphs on the clothing pieces) you have dialed into a character. I have included both versions, simply because not everyone is fond of superconforming, and some prefer to just dial things in as they wish. Should you encounter any pokethru while using the superconforming versions (as combinations of morphs will sometimes create) simply use the adjustment morphs to tweak to perfection. All DAZ Morphs aside, If you are opting to use my Hera character, she has a special morph on all the pieces that will fit her perfectly.

To pose the skirt of the dress, as well as the Chitons, these both use Bodyhandles. The dress has four, which control the sides, front and back of the dress. The Chitons only have two bodyhandles (to control each chiton) Click each bodyhandle, and then use the rotational dials to pose the skirt. Since the Chitons are limited in how much they move (as the upper-half conforms to V4) I have also included a bunch of movement morphs, to make them windblown. You can use these morphs in conjunction with the bodyhandles, but they weren’t designed to be — and basically, that means you could get unwanted effects. Finally, the Sash on the dress is controlled by normal rotational dials as well as Easy Pose. The node for the easy pose controls is on Sash 1 (the first segment in the chain) From here, you can easily control the full chain in full easy motion. If you click on each segment thereafter, you can control the easy pose even further, by either posing before or after that segment in the chain. I have pretty much left forcing limits off on everything (although, if you opt to have limits on in DS or Poser, it will have limits set) but keep in mind, over-extension is possible, so pose carefully.

One thing I want to mention, is that the dress and Chitons both have the chiton pins and jewels, in the same exact location. Ive done this for the simple reason that perhaps some might want to keep the jewels on the dress, but might not want to use the chitons. However, when you load these together, both of them have the pins and jewels visible in the exact same place and they will consequently superimpose over one another. While its not a huge deal in most cases, you might find when using the combination with morphs, that one of them shows thru the other. In order to combat this, I have included a dress pin off mat for the dress. This will turn them invisible, so theres no superimposition.

Finally, if you’re using Poser, you will need to use V4’s magnetize poses with the outfit pieces (more specifically, the dress)

Aside from the outfit itself, there are also some utility mats included. These will turn off certain parts (such as discussed above, with the chiton pins) The others will turn off the bodyhandles on the dress and chitons (for DS users) and there is also a pose to turn off the sash on the dress, should you wish to. Ive included mats for all the pieces and their default textures (so that if you buy the other character packs in this series, which come with textures for this dress, you have a default mat pose to defer back to) DS Optimized mats have also been included.

===== OTHER NOTES: =====
Color coded and labeled templates for all figures and props are available, so you can make your own textures.

All figures have blank injection channels for custom morph support

The thumbnails for the pose and light files are the standard 91X91 resolution, so that they will show properly in DAZ Studio. If you are a poser 5 or higher user and prefer the larger thumbnails (which are 125×125 in size), you can download them here: Olympian Goddess Thumbs

Please Note: Bigger thumbnails will NOT work in DAZ Studio, nor lower versions of Poser, so only download these if your using Poser 5 and higher.

Instructions to install larger thumbnails: These are set up to the same exact locations as the original sets thumbnails. To install, simply unzip it to your Poser Runtime, and overwrite the old thumbnails.

KNOWN ISSUES
As covered in the instruction section, when using the conforming clothing in Poser, you may need to use the Magnetize clothing to V4 poses (which come with V4) so that absolutely no poke thru will occur.

Posing the bodyhandles by their dials is necessary in DS, as trying to move them via manipulator alone will have unwanted results. This is the case with all bodyhandled outfits.

The Sash has adjustment morphs to account for the abdomen bends (side-side, back-fwd and twist) You must dial these adjustments in for posing the abdomen by using the BODY actor’s FBM’s (this will make all the parts pose at once, rather than having to dial in the morphs individually on all the sash segments)

Technical Support is always available. If you have questions that need answers, feel free to email me — IgnisSerpentus@damageinc3d.net